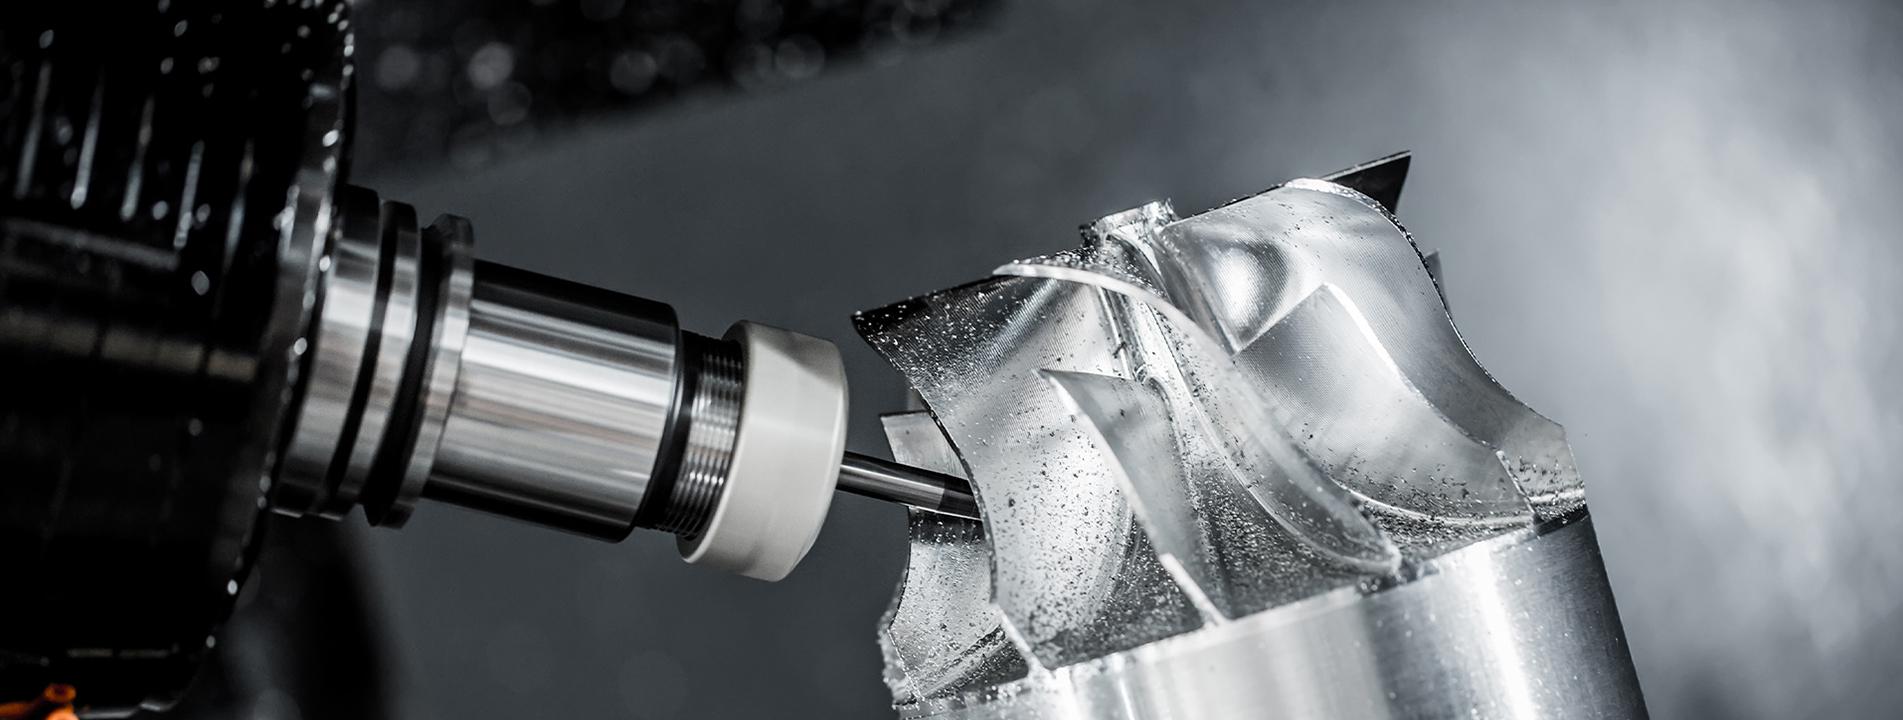
In precision stamping die making, people talk a lot about grinding, wire EDM, and heat treatment. But one of the most underestimated steps is the moment a punch meets the punch plate: the interference fit.
It looks simple. The punch shank is a few microns larger than the plate bore, you press it in, and it stays. In reality, this is where perpendicularity, edge life, and strip guidance are won or destroyed.
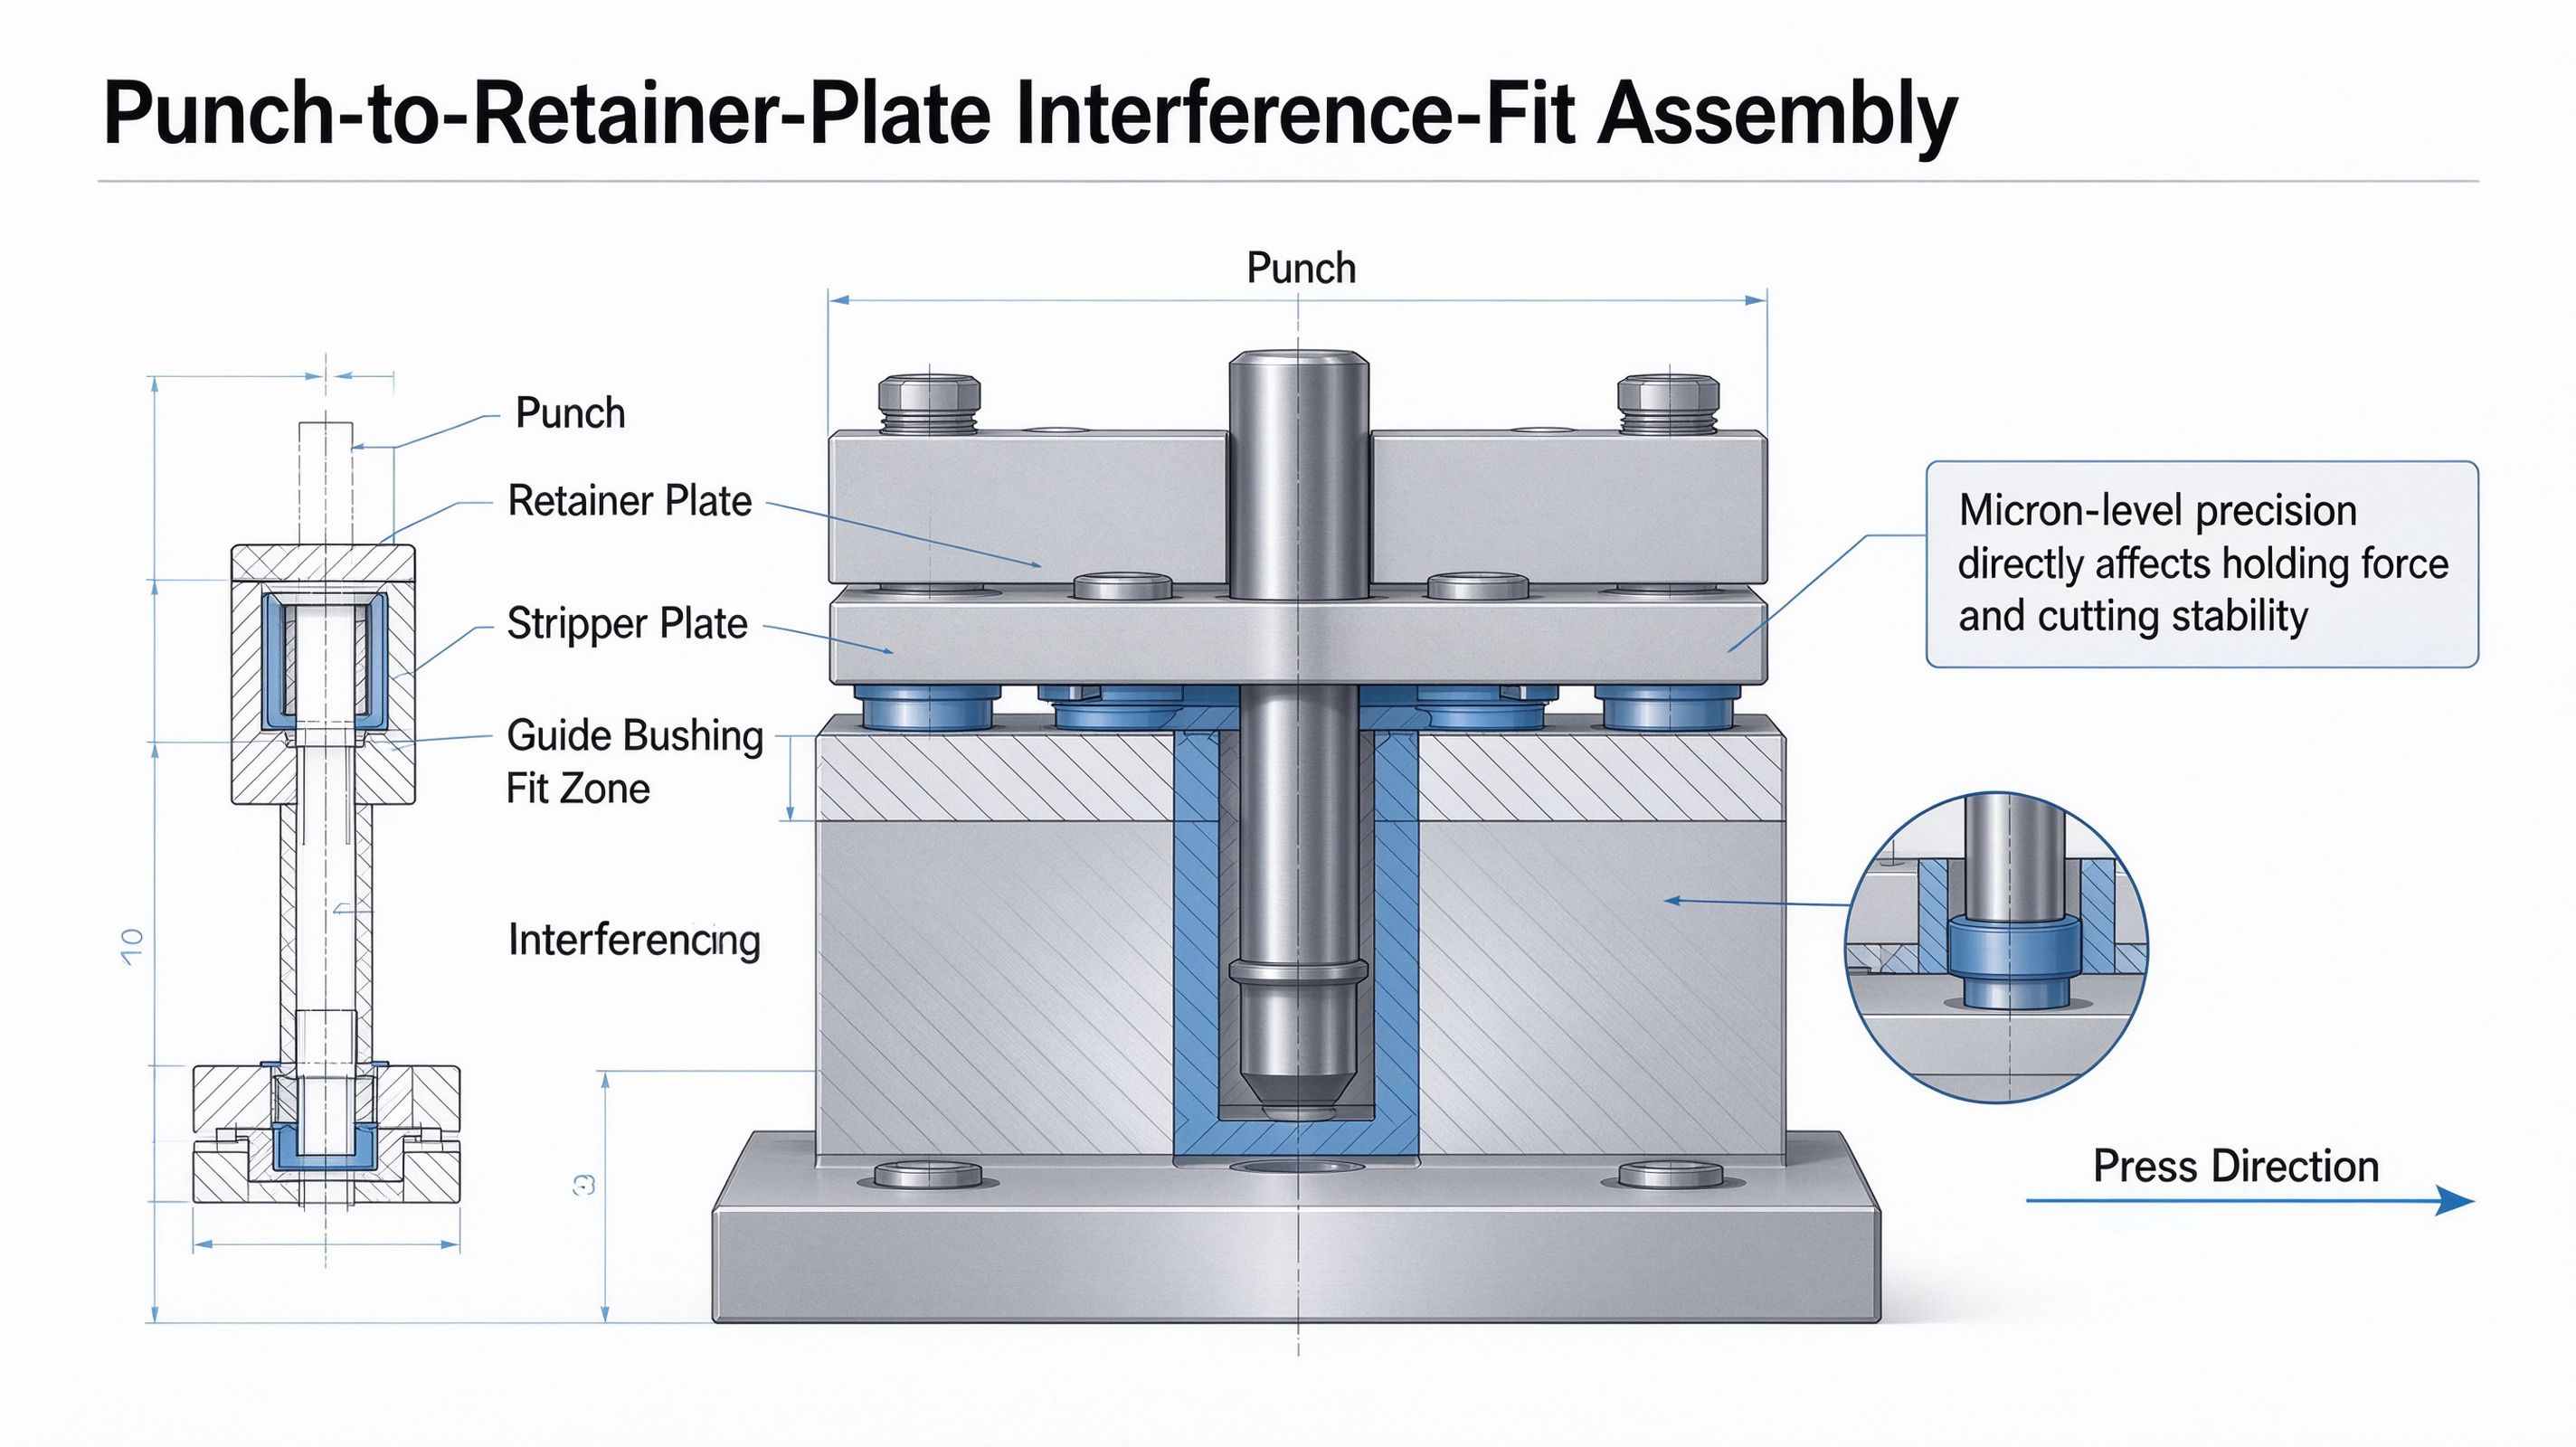
A punch is not just “held” by the retainer plate. The press fit must keep the punch axially secure while allowing the stripper and guide bushing to control lateral motion. If the fit is too loose, the punch rocks, the cutting clearance becomes uneven, and burrs grow. If the fit is too tight, the plate bore distorts, the punch shank sees residual stress, and micro-cracks can start near the shoulder.
In other words: too little interference means premature wear; too much interference means broken tooling.
For steel punch-and-plate assemblies, interference is usually expressed in microns. A common rule of thumb is a very small percentage of the shank diameter, but the correct value depends on plate hardness, shank material, engagement length, and surface finish.
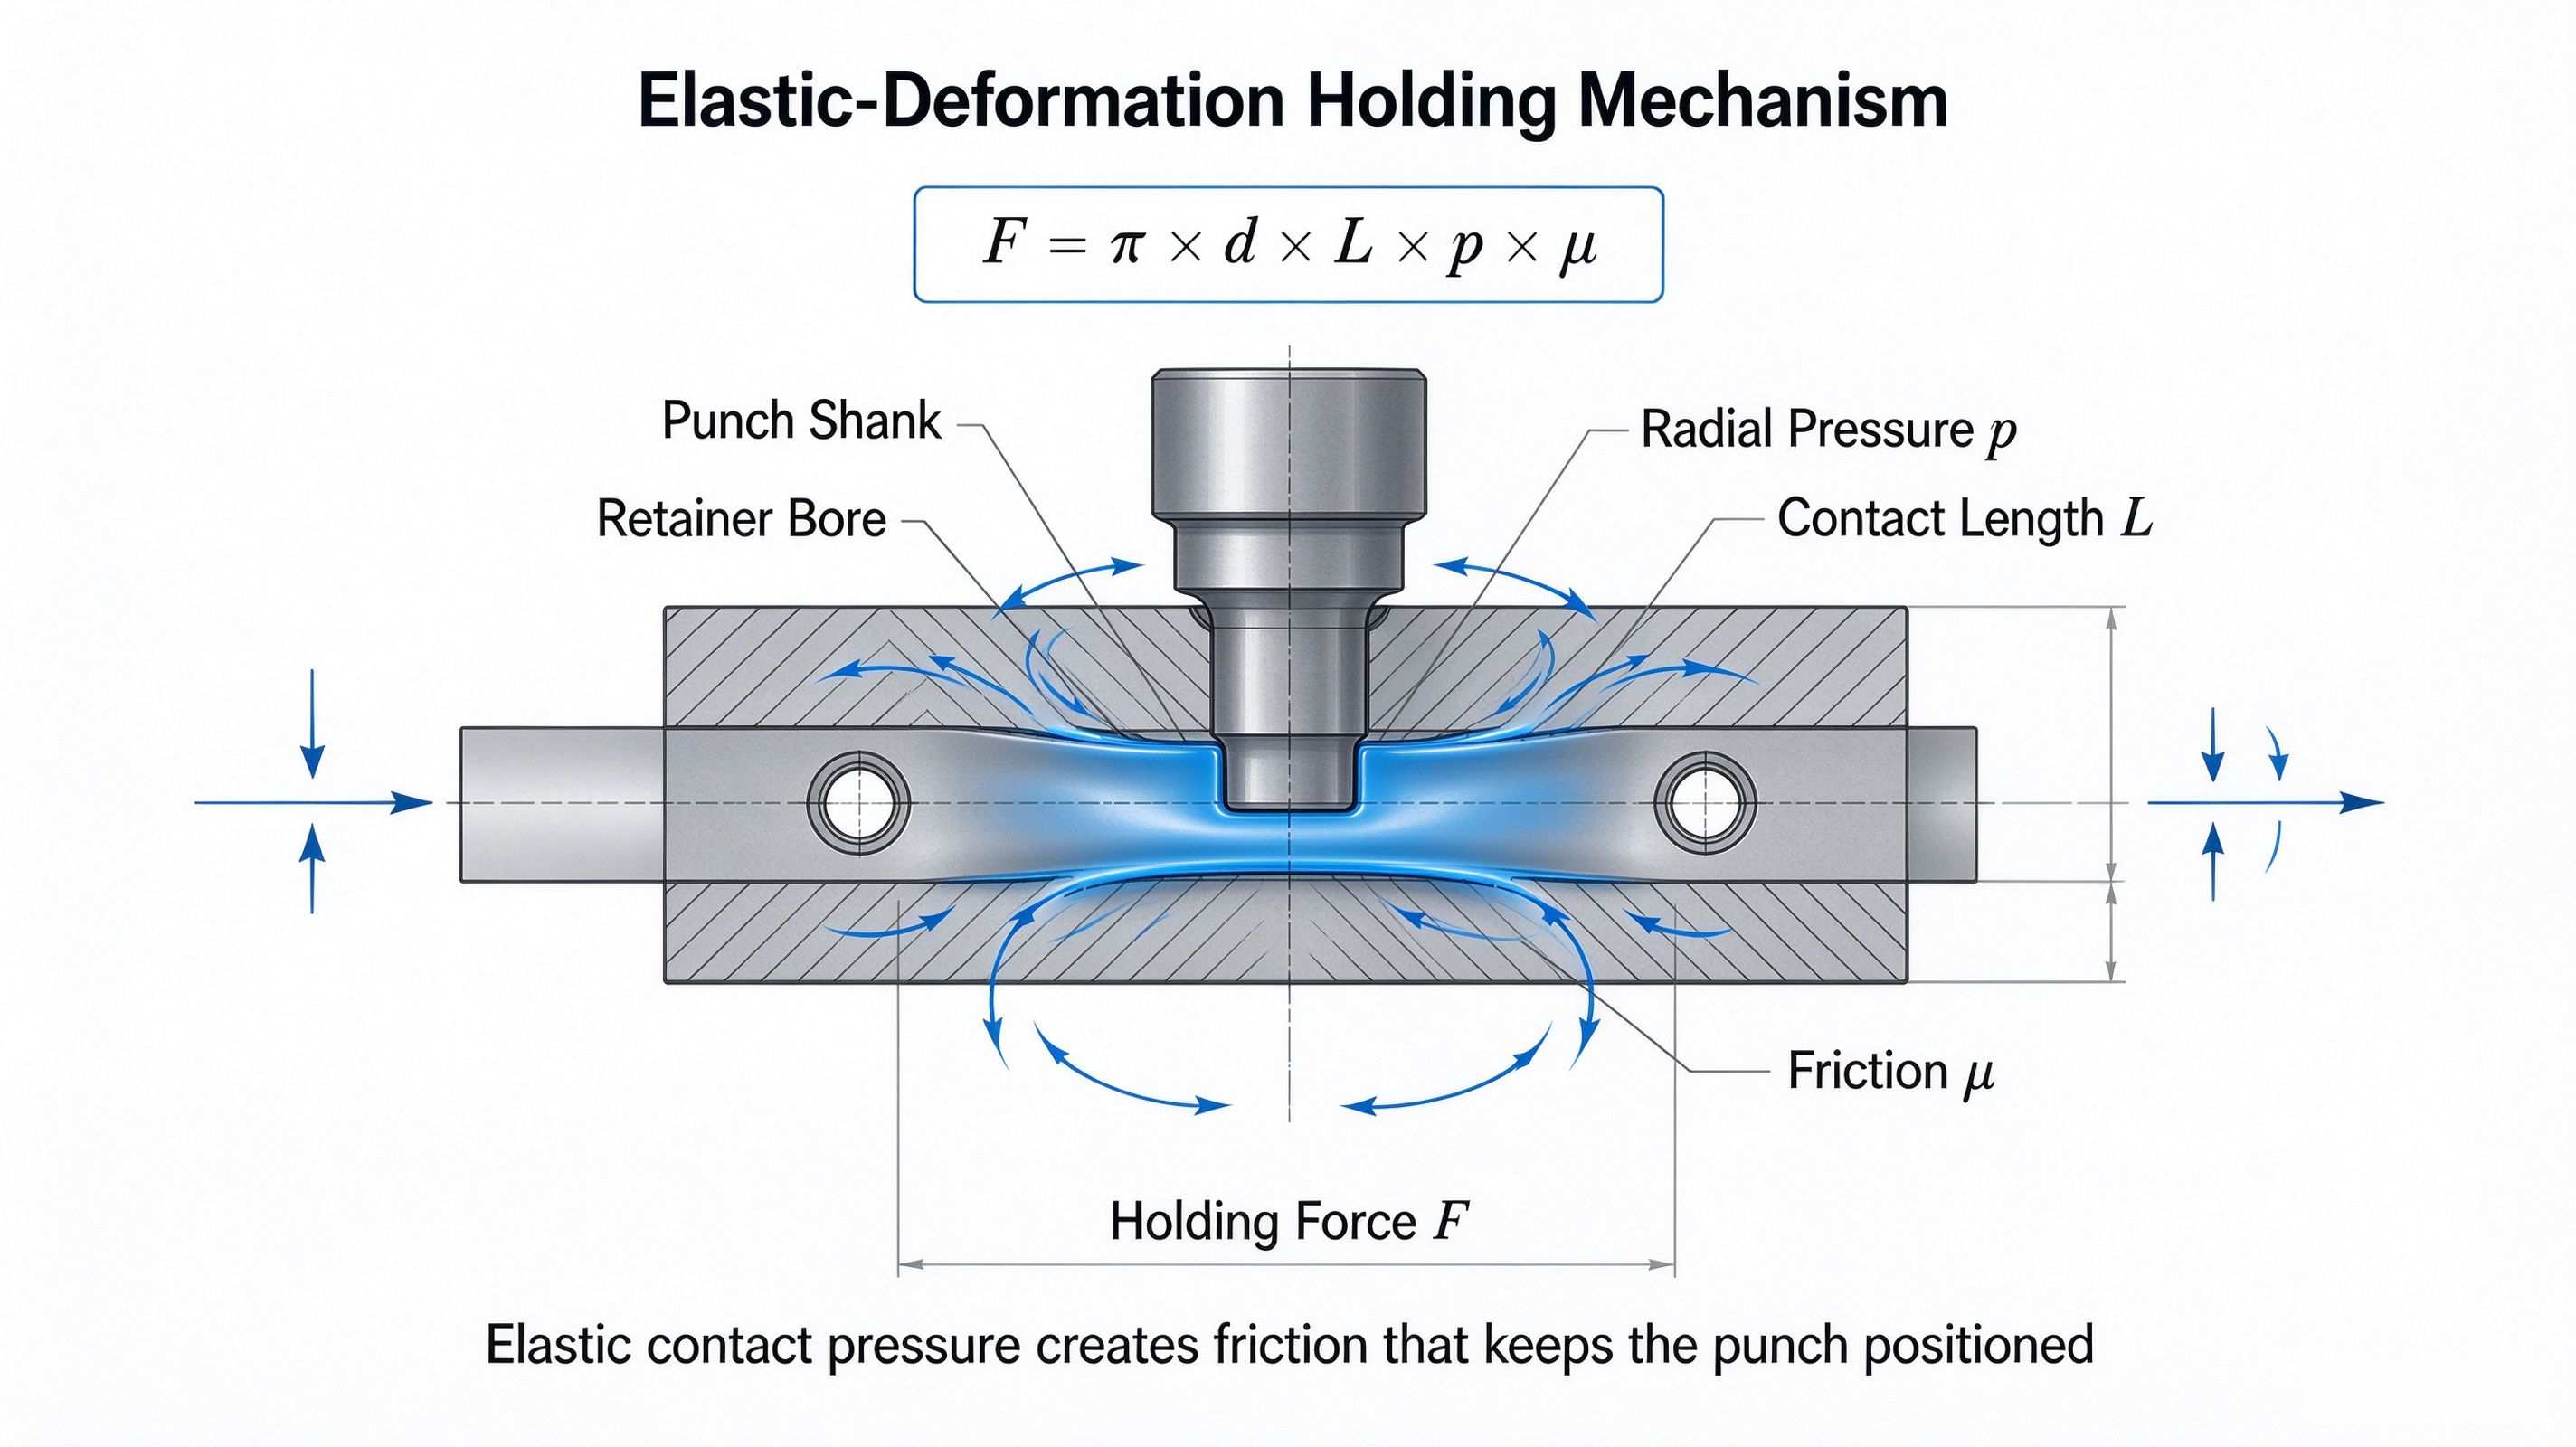
The holding mechanism is elastic deformation. The oversized shank expands the plate bore; the plate pushes back. That radial contact pressure, multiplied by friction, creates retention. The classic estimation is:
F = π × d × L × p × μ
where
· d = interface diameter
· L = engagement length
· p = contact pressure
· μ = friction coefficient
A few microns of extra interference can raise press force dramatically. That is why “it went in a bit hard” is not a minor complaint—it is a process alarm.
Most punch failures attributed to “bad steel” are actually assembly errors.
If the punch enters the plate tilted, the bore acts like a broach. It reams itself slightly larger on one side, local pressure spikes, and the punch leans. After assembly, the punch may look seated, but its axis is no longer square to the plate face. Under high-speed stamping, that lean becomes side load, galling, and finally breakage.
Good die makers respect three things here:
1. Chamfer the entry side. A 15°–30° lead chamfer on the bore or punch nose lets the parts self-center instead of digging in.
2. Control roundness and cylindricity. A punch can be “the right size” and still fail if it is oval. Interference fits punish geometric error more than nominal size error.
3. Press straight, not hard. Hydraulic or servo presses with aligned tooling beat hammers every time. Impact force hides misalignment and creates shock stress.
There are three ways to create an interference fit:
· Cold press: push the punch in at room temperature. Simple, but galling risk is highest.
· Thermal fit: heat the plate so the bore expands, insert the punch, let it shrink back. Great for larger or harder plates.
· Cryogenic fit: chill the punch so it shrinks, insert, then let it return to room temperature. Useful for fragile plates or delicate geometries.
For high-hardness punch plates, many shops reduce interference and rely on headed punches, screws, or peened heads for retention. Press fit alone is not always the hero.
A servo press gives you more than force. It gives you a fingerprint.
A healthy press curve rises smoothly as engagement increases, then spikes sharply at seating. Warning signs include:
· force too high at the start → no lead chamfer, burr, or oversize
· sawtooth curve → galling or poor lubrication
· sudden drop → crack or local collapse
· no seating spike → wrong depth or obstruction in the bore
Once you’ve seen enough curves, press fitting stops being luck. It becomes inspection.
· Measure the actual punch OD and plate bore; do not trust the drawing alone.
· Keep mating surfaces clean, burr-free, and within Ra 0.8–1.6 µm for most steel applications.
· Use a lead-in chamfer; never press a sharp corner into a hard plate.
· Verify perpendicularity after seating with a dial indicator or CMM.
· Validate the first article before batch assembly.
· If the plate is harder than about HRC 48, reduce interference and add mechanical retention.
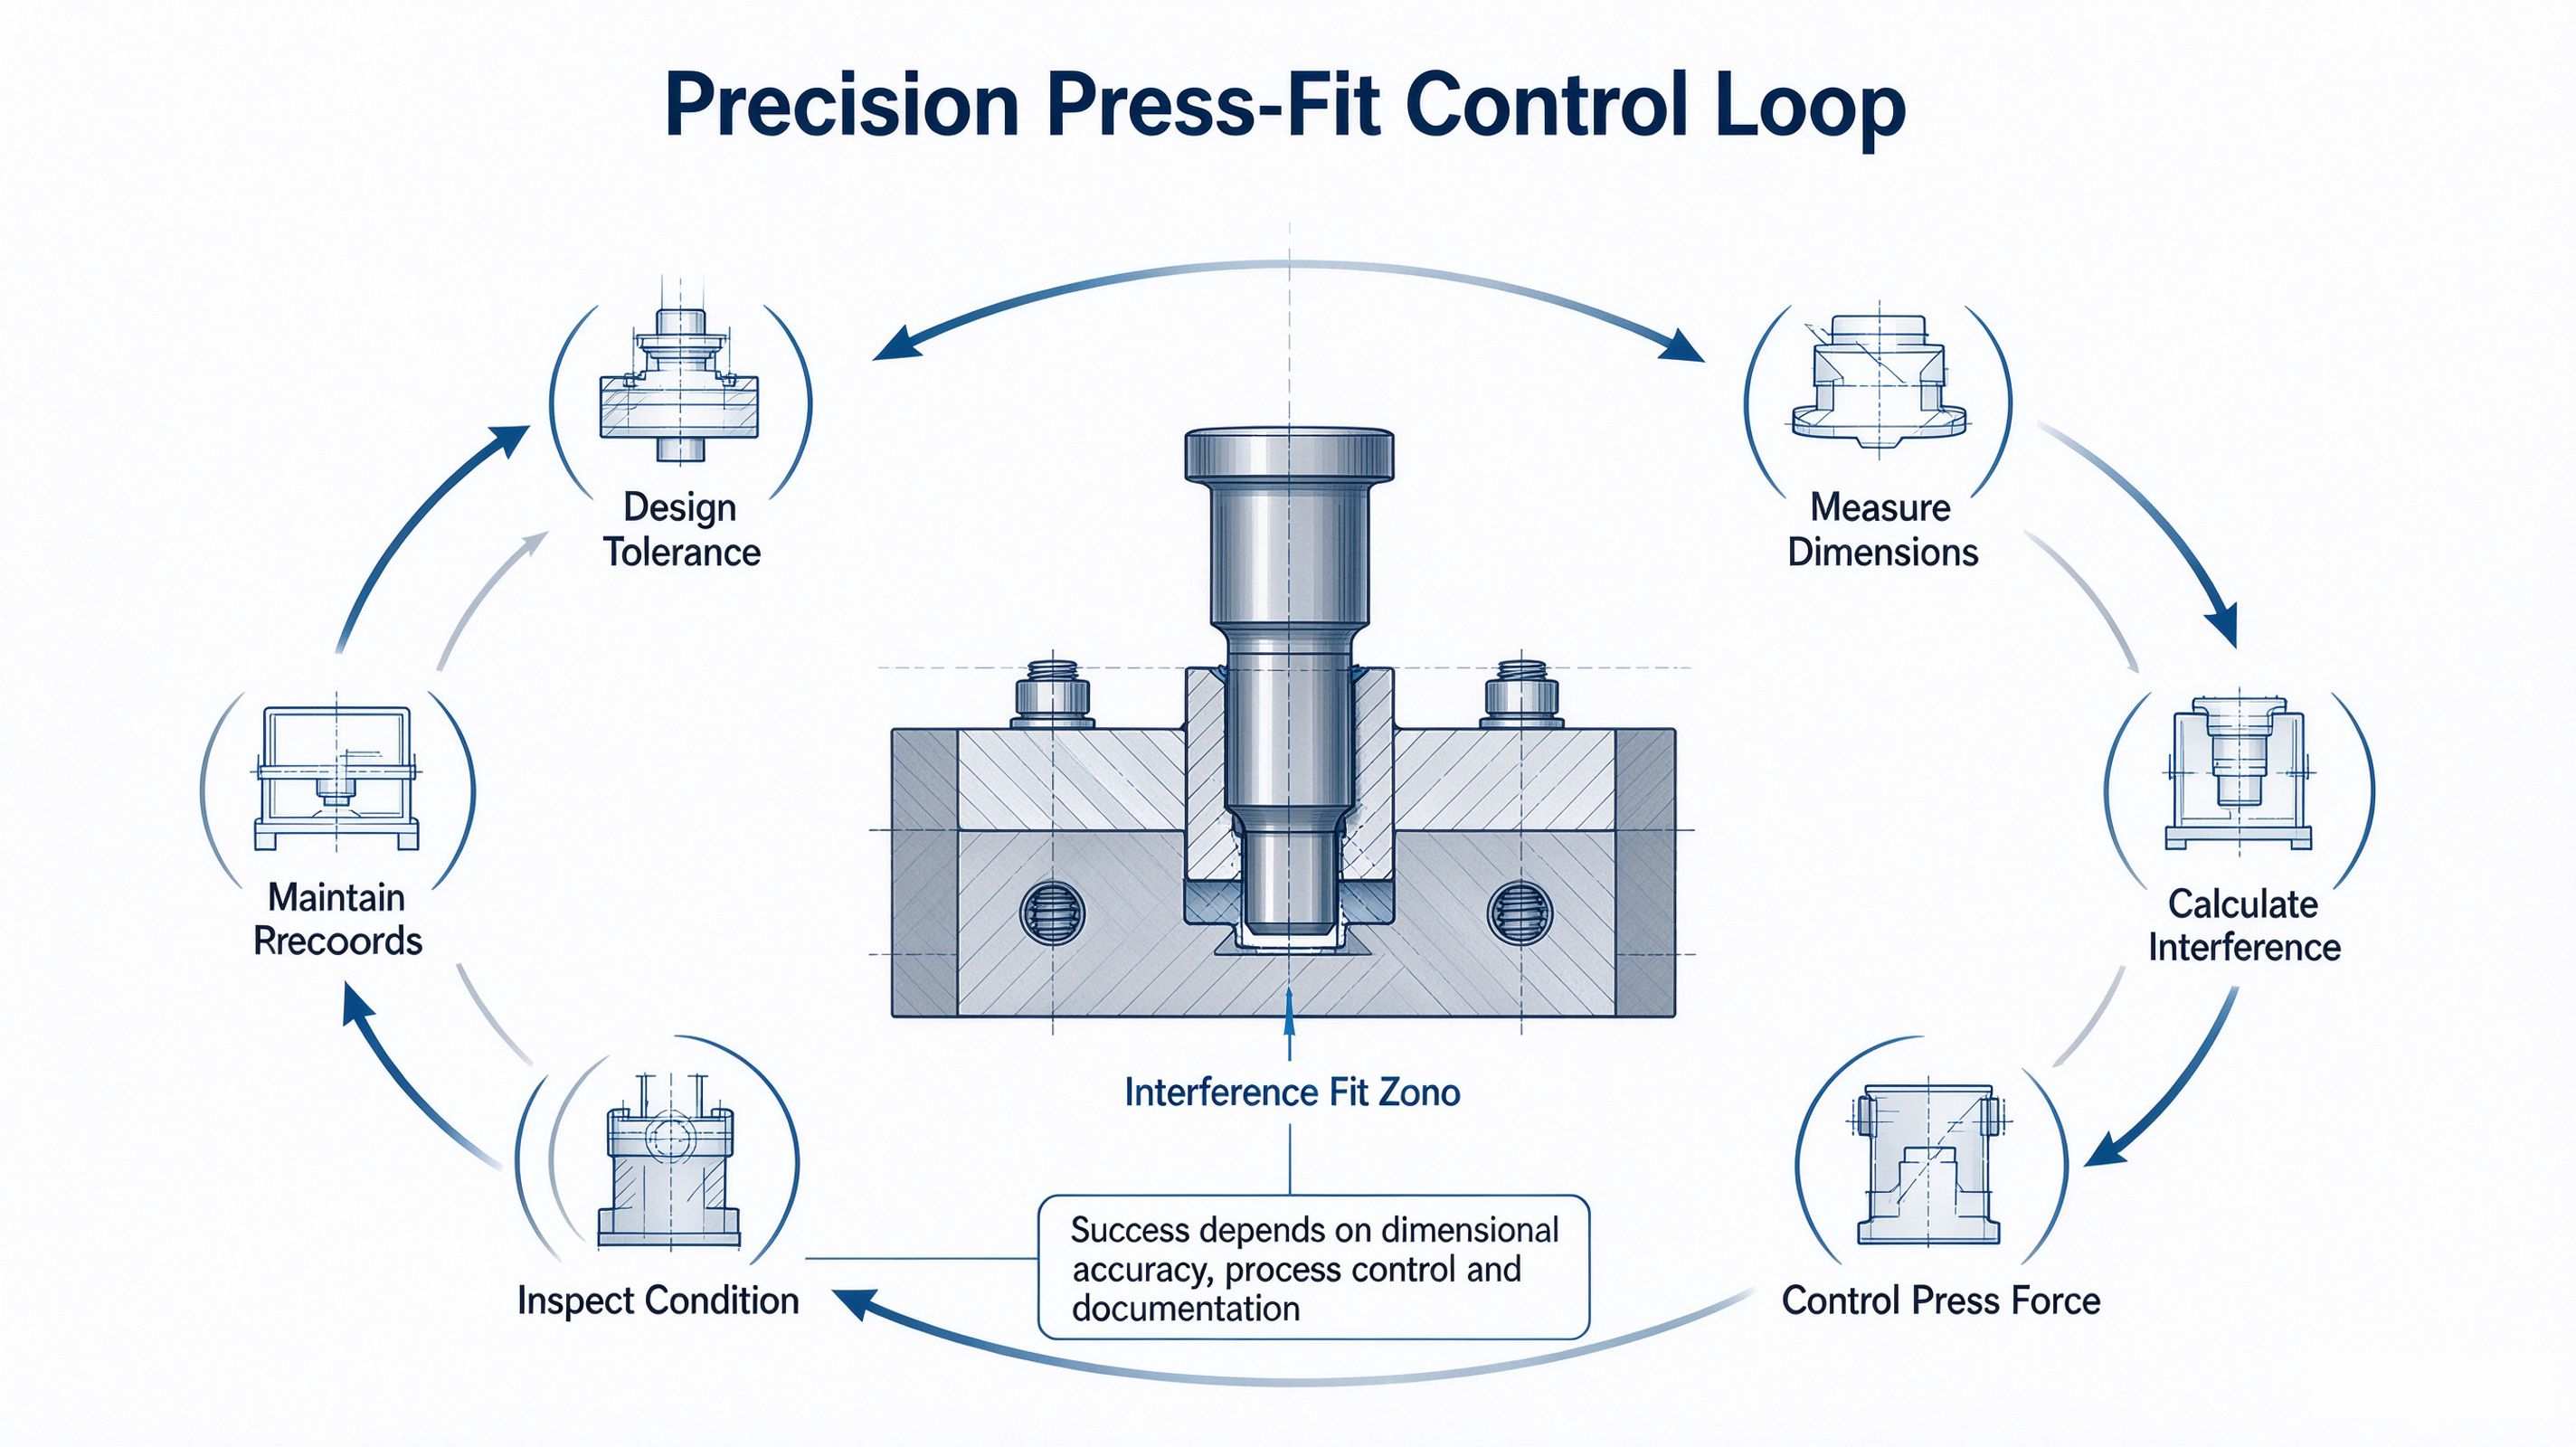
Press-fit assembly is not mystic craft reserved for old toolmakers. It is applied elasticity, friction control, and geometric discipline.
When a punch breaks after 30,000 strokes, the root cause may not be heat treatment. It may be the 8 microns of interference nobody wrote down, the missing chamfer nobody noticed, and the tilt nobody measured.
In precision tooling, the fit is the function. Get the press fit right, and the die speaks quietly. Get it wrong, and it screams—through burrs, noise, and broken punches.


© 2026 © HONGYU MOULD LIMITED. All Rights Reserved.
 IPv6 network supported